




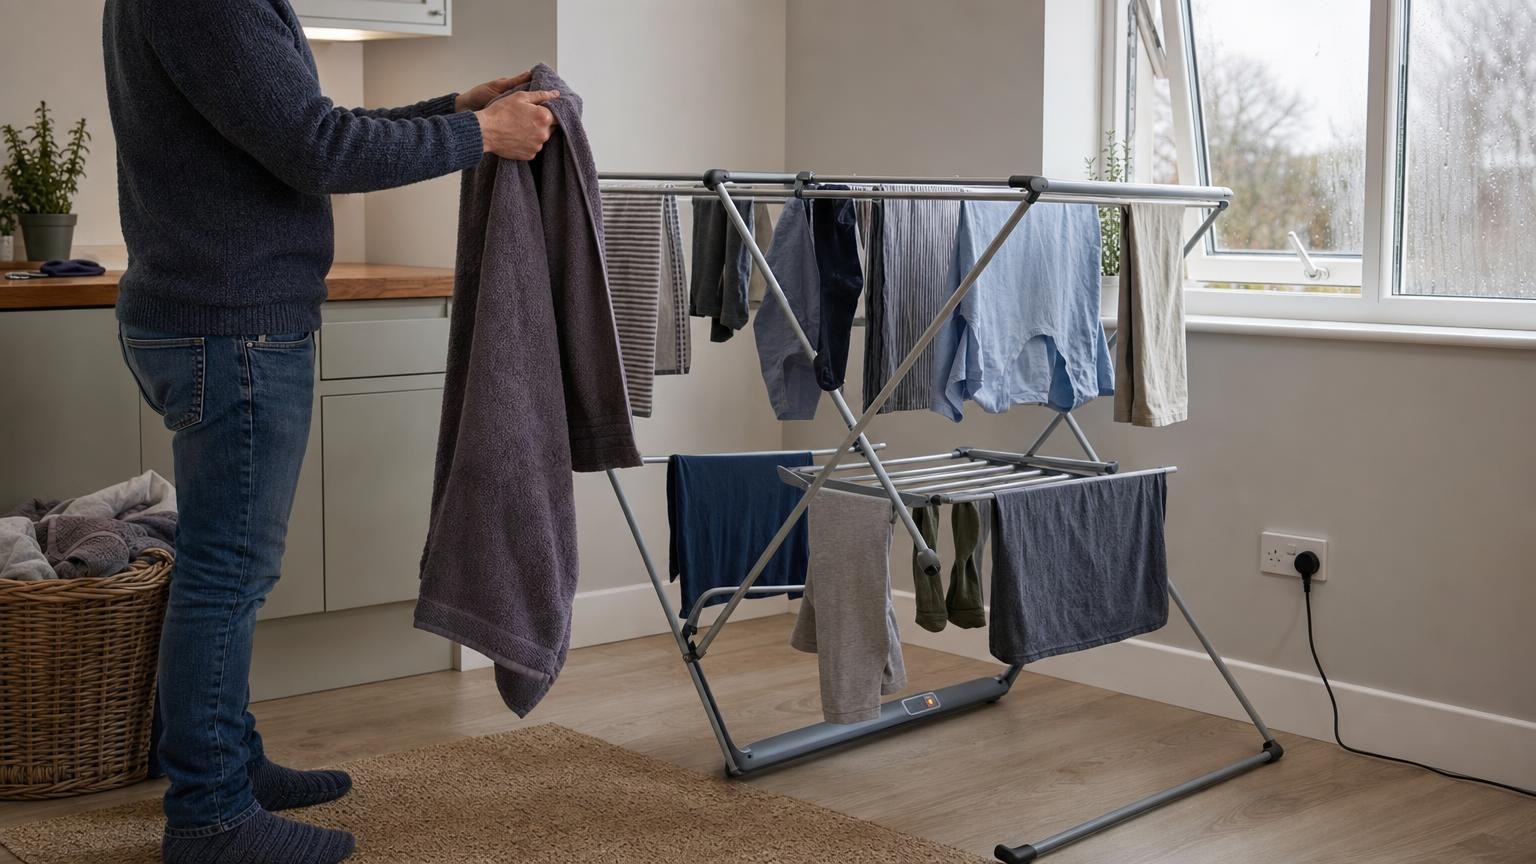
Cold, damp weather can make indoor laundry slow to dry, particularly when opening windows is uncomfortable and outdoor drying is unreliable. A heated clothes airer can help by applying gentle heat close to the washing, but it should not be treated as a miniature tumble dryer. Results depend on the design, the fabrics, how the clothes are arranged and what happens to the released moisture.
The right choice is therefore not simply the airer with the most rails or the highest wattage. It is the one that fits your available room, typical wash load and willingness to space, turn and manage laundry while it dries.
Why a heated airer can help in a British winter
A standard clothes horse relies mainly on room temperature and natural air movement. In winter, cool indoor conditions and high humidity can slow evaporation. A heated airer warms its rails, shelves or enclosed drying space, helping moisture leave the fabric more readily.
This localised heat can be useful for households that need to dry everyday clothing without heating an entire room solely for laundry. It may also make drying conditions more consistent when outdoor weather is changeable. However, it does not remove moisture from the home. Water that leaves the clothes enters the surrounding air unless it is carried outside through ventilation or collected by a separate dehumidifier.
Expect performance to vary across a load. Lightweight garments may dry relatively readily, while waistbands, pockets, seams, towels and thick knitwear can remain damp for longer. How much attention you give to arranging or repositioning these items can matter as much as the headline specification.
Choose the right format for your laundry and floor space
Heated clothes airers come in several broad formats. Each uses room space differently, so begin by measuring the area where the airer will actually operate rather than focusing only on storage dimensions.
Winged airers
A winged design resembles a conventional folding clothes horse, with a central section and adjustable side wings. Its open layout generally provides convenient access and can accommodate a mixed load, including smaller items placed across the middle and longer garments hung from raised wings.
The trade-off is a relatively wide working footprint. Consider whether open wings will obstruct doors, walkways or furniture. Adjustable wings are useful only if their available positions suit the garments you intend to hang.
Tiered airers
Tiered models use vertical space by placing several drying levels above one another. They can provide substantial rail area within a narrower footprint, which may suit utility rooms, kitchens or compact living spaces.
Closely stacked levels can make access harder and leave limited clearance for shirts, trousers or dresses. Lower garments may also sit beneath damp items above them. Check whether tiers can be folded independently, as this can create space for longer pieces and make partially filled loads easier to arrange.
Cabinet-style airers
An enclosed cabinet-style dryer typically hangs clothes inside a fabric chamber while warm air circulates within it. This is different from simply placing laundry on heated rails. It may offer useful hanging height and a more contained drying environment, but it requires careful set-up and adequate spacing between garments.
Check the assembled height and footprint, the hanging arrangement and where moist air exits. A cabinet that looks compact when stored may still be prominent when operating. It should also be used only with its intended enclosure and according to its instructions.
Look beyond headline capacity
Rail length, tier count and stated maximum load can help compare products, but none tells you exactly how much washing will dry effectively at once. A large theoretical drying area may be difficult to use if rails are close together or if filling every rail causes clothes to overlap.
Think about a normal load in terms of actual items. Socks and underwear use rails differently from shirts, towels or bedding. Wide garments can cover several rails, while thick items may need empty space around them. Bedding can dominate an open airer and reduce airflow to everything beneath it.
Also consider how weight is distributed. Wet laundry is heavier than dry laundry, and concentrating towels or knitwear on one wing or tier may affect stability. A stated total load limit does not necessarily mean that the full weight can be placed anywhere. Follow any guidance about individual sections and distribute heavier items evenly.
Useful capacity is the amount you can arrange without tight bunching, excessive overlap or blocked access. If you regularly wash bulky loads, a physically larger and more open design may be more practical than a compact model with an impressive total rail measurement.
Understand how the heat reaches clothes
On many open airers, the rails themselves become warm. Fabric in direct contact with a heated rail receives heat more readily than fabric hanging between rails. This can lead to warm, dry stripes while thicker folds or unsupported sections remain damp. Spreading items across more than one rail and turning them periodically can promote more even results.
Some designs have heated shelves or broader bars that increase the contact area. These can suit items laid flat, although care labels should always be checked before drying delicate garments with direct heat. Avoid folding thick pieces into dense layers merely to fit more onto the airer.
A compatible cover can retain warmth around an open heated airer and reduce the loss of heated air into the room. It does not eliminate the need for spacing or moisture control. Crowding the covered space can restrict circulation, and damp air still needs to escape or be managed. Use only a cover approved for the specific design rather than substituting blankets, sheets or other household fabrics.
Compare power, controls and likely running costs
Wattage describes electrical power draw, not guaranteed drying speed. A higher-powered appliance may provide more heat, but drying time also depends on load size, fabric thickness, starting moisture, room conditions and heat distribution. Comparing wattage alone can therefore be misleading.
You can estimate the electricity cost of a drying session with a simple calculation:
Power in kilowatts × hours used × electricity price per kilowatt-hour = estimated cost.
To convert watts to kilowatts, divide by 1,000. For example, use the wattage stated by the manufacturer, multiply it by the expected operating time and apply the unit rate shown on your own electricity tariff. The result is an estimate because thermostatic controls or variable heat settings may change actual consumption.
Controls can make day-to-day use easier. Features worth assessing include:
- A timer: useful when you do not want to rely on remembering to switch the airer off.
- Heat settings: potentially helpful for different load sizes or fabrics, where provided and used in line with care instructions.
- Automatic shut-off: an additional control feature, although it does not replace correct set-up or supervision required by the instructions.
- Accessible switches: controls should be visible and reachable without moving wet laundry or reaching into an awkward gap.
- Clear indicators: a power or heat light can make it easier to see whether the appliance is operating.
Check exactly what a timer does. Some switch the appliance off after a selected period, while others may offer more detailed scheduling. Do not assume a feature from a short product label alone.
Plan for moisture, airflow and room conditions
Heating laundry speeds evaporation, but the resulting water vapour remains indoors. Without moisture management, windows and cold surfaces may develop condensation. Ventilation is therefore part of the drying process, not an unrelated consideration.
Use the airer in a room where you can manage airflow safely, following the manufacturer’s placement guidance. This might involve background ventilation or opening a window periodically when conditions allow. A dehumidifier can collect moisture from the air, but it is a separate powered appliance with its own operating requirements and costs.
The washing machine’s spin cycle also affects the task. Clothes that begin with less retained water generally require less evaporation after washing, provided the fabric and care instructions permit the selected spin speed. Before placing items on the airer, shake them out, open folded areas and separate sleeves and trouser legs.
Leave gaps where possible, especially around towels and dense cotton. Check thick seams, collars, cuffs and pockets before putting clothes away. Turning or repositioning items during a session can expose damp sections to warmer rails and moving air. When using a cover, avoid packing the chamber so tightly that air has no useful route around the garments.
Check stability, materials and everyday safety features
A heated airer combines an electrical appliance with wet laundry, so construction and set-up deserve close attention. Look for a stable leg arrangement, secure locking joints and feet suited to the floor on which it will stand. Tall tiered designs should feel balanced when loaded evenly.
Inspect how the rails are finished. Smooth surfaces reduce the chance of snagging delicate fabrics, while joints and hinges should not create obvious trapping points during folding. Check stated load limits and whether separate limits apply to wings, shelves or hanging bars.
Cable length and routing matter too. The lead should reach a suitable socket without crossing a busy walkway or being pulled taut. Consider where the plug, switch and any control unit will sit in relation to wet garments. Keep electrical connections away from water and do not operate the appliance with damaged cables or components.
Always follow the manufacturer’s instructions and garment care labels. Place the airer on a stable surface, keep required clearances around it and do not add an improvised cover. Avoid overloading rails or hanging items where they can drip onto controls or connections. Product-specific instructions should take priority over general advice.
Think about set-up, storage and long-term ownership
An airer may be easy to store yet frustrating to unfold, or spacious in use but too bulky for everyday living. Check both assembled and folded dimensions. Include projecting feet, wings and controls rather than assuming the main frame measurement represents the whole footprint.
Consider whether the airer locks clearly into its operating position and whether one person can unfold it without wrestling with several loose sections. Wheels can help with an empty unit, but moving any airer while it is loaded or operating may be unsuitable. Follow the instructions rather than treating portability as automatic.
For storage, decide where the cable will go and whether the folded frame can stand securely or must lie flat. Removable covers need somewhere to dry and be stored. Rails should also be easy to wipe clean, as residue or dust can transfer to freshly washed clothing.
A larger drying area can reduce crowding, but only if you can tolerate the appliance occupying that space for hours at a time. In a small home, a slightly lower-capacity model that fits a realistic operating position may be more useful than a larger one that is rarely convenient to set up.
Match the specification to your routine
Start with format and dimensions: identify where the airer will stand, how much floor and vertical space is available, and what it could obstruct. Next, judge usable capacity by picturing your usual garments on the rails rather than relying solely on a total rail-length figure.
Then consider how heat is delivered, whether you are prepared to rotate laundry and whether a compatible cover suits your approach to airflow and moisture. Use wattage and your own tariff to estimate operating cost, and decide which controls would genuinely support your routine.
Finally, check stability, load guidance, cable placement, ventilation needs and folded storage dimensions. The best heated clothes airer is not necessarily the largest or most powerful. It is the design that accommodates your typical fabrics and load size, fits safely into your home and makes winter laundry manageable without creating new problems of crowding, condensation or inconvenient storage.
Continue exploring on Frowse
Discover More Frowse Insights
- Why a Tripod’s Load Rating Does Not Tell You How Steady It Will Be
- Why Noise-Cancelling Headphones Work Better on Some Sounds Than Others
- The Roof-Rack Fit Problem: Rails, Fixing Points and Clamp Systems Explained
- Airflow, Airspeed and Nozzle Shape: How to Judge a Leaf Blower’s Real Capability
- What a Sleeping Mat’s R-Value Reveals – and What It Leaves Out