





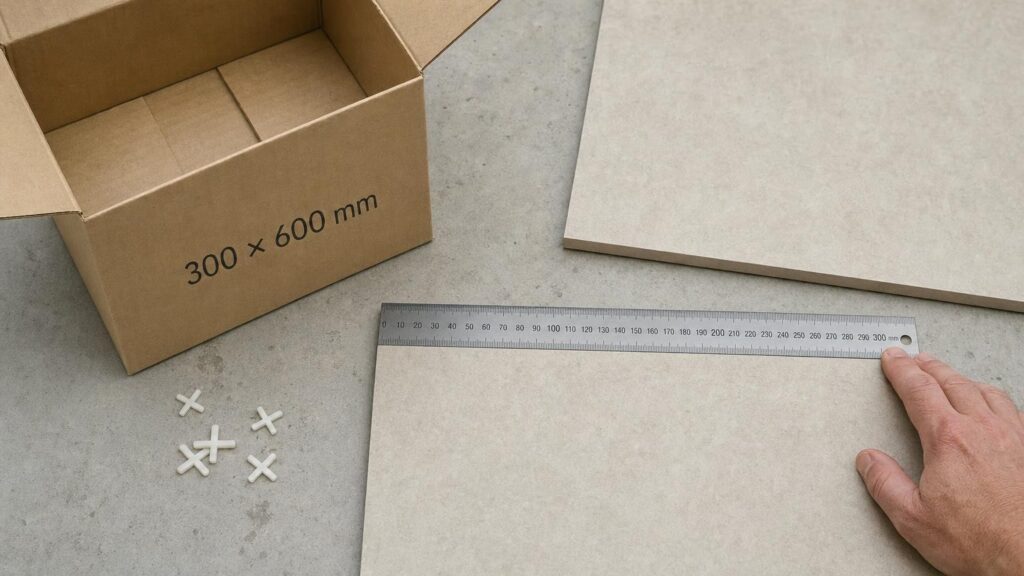
A tile described as 300 x 600 mm may not measure exactly 300 x 600 mm when you put a tape measure against it. In many cases, the dimensions printed on the box or marketplace listing describe a nominal format rather than the precise dimensions of every tile inside.
This distinction is easy to overlook, but it can affect grout joints, pattern alignment, cuts at the edges of a room and whether tiles from separate orders can be used together. Understanding nominal size, actual size, calibre and edge type helps you assess tiles more accurately before installation.
The box size is a label, not necessarily a measurement
Nominal dimensions are convenient format names. They allow manufacturers, sellers, designers and shoppers to refer to a recognisable tile size without presenting every minor production variation as a different product.
The actual size is the measured length and width of the tile body. Depending on the product, it may be listed in technical information, printed on the packaging or indicated through a calibre code. It may be slightly smaller or otherwise different from the nominal dimensions.
This does not automatically mean the tiles are faulty or incorrectly labelled. The key question is whether their actual dimensions and permitted variation are suitable for the intended layout. When comparing products online, treat the headline size as a format description until the detailed specifications or packaging confirm otherwise.
Why fired tiles can vary in size
Ceramic and porcelain tiles are made by forming a mineral-based body and firing it at high temperature. Moisture leaves the material during drying and firing, and the body changes as it becomes a finished tile. Small differences in raw materials and production conditions can influence the final dimensions.
Manufacturers control this process, but fired products can still show dimensional variation within an accepted production tolerance. Variation is particularly relevant when tiles retain the edges created during forming rather than being cut to a more uniform final size after firing.
Normal dimensional variation should not be confused with other problems. A chipped corner is damage. A layout that gradually loses alignment may result from setting-out or installation choices. A significant mismatch between boxes may indicate that different calibre or production groups have been mixed. Measuring and checking the package markings helps distinguish these issues.
Calibre: how tiles are sorted after manufacture
After production, tiles may be measured and sorted into calibre groups. Tiles within a calibre are grouped because their dimensions are closely related. The calibre marking may be a number, letter or another manufacturer-specific code.
Two boxes can therefore carry the same nominal format while displaying different calibre markings. Both may correctly belong to the advertised size category, yet their tile bodies may not align neatly when installed together.
Calibre is not necessarily the same as a production batch or shade identifier. One relates primarily to dimensional grouping, while other identifiers may help track when or how the tiles were produced and grouped for appearance. The terminology and coding system vary, so the manufacturer’s label should be treated as the authoritative guide.
For one continuous installation, it is prudent to compare:
- The nominal format
- Any stated actual dimensions
- The calibre code
- Production, lot or batch identifiers
- Shade or appearance codes where provided
- Thickness and edge description
A matching nominal size alone is not enough to establish that separate boxes are interchangeable.
Rectified and pressed edges are not the same thing
Rectified tiles
Rectified tiles are mechanically cut or ground after firing to produce straighter edges and more consistent finished dimensions. This can support a precise, regular appearance and may allow relatively narrow joints where the product instructions, substrate and installation conditions permit.
However, rectified does not mean perfectly identical. Manufacturing tolerances still exist, and other characteristics such as flatness can affect the finished layout. Rectification also does not mean that tiles should be fitted edge to edge without grout joints.
Pressed or non-rectified tiles
Pressed, unrectified or non-rectified tiles retain more of the edge profile created during forming and firing. Their edges may be slightly rounded, cushioned or less sharply defined, and dimensional variation may be more noticeable than with a rectified equivalent.
A suitable joint can absorb small differences and help the installer keep visual courses aligned. The visible gap at the tile surface may also be affected by a rounded edge, so two installations with the same underlying spacing can look different.
Neither edge type is inherently right for every room. Rectified edges favour a crisp geometric effect, while formed edges may suit a softer or more traditional appearance. The practical choice depends on the desired look, the tile’s measured variation and the demands of the layout.
How modular sizing accounts for the grout joint
Some tile formats are designed around a module: the space occupied by a tile plus its intended grout joint. As a result, the tile body may be deliberately smaller than the nominal module printed on the box.
For example, a nominal format used in a repeating grid may need to fit alongside related formats while leaving room for joints. If the body measured the full nominal dimension, adding grout would make each repeated unit larger than the planned module.
This becomes especially important in multi-format designs. A combination of smaller and larger tiles may appear mathematically compatible from the box descriptions, but the actual bodies and joint widths determine whether the pattern aligns. Simply adding nominal dimensions can therefore produce the wrong result.
Before committing to a modular pattern, place a representative set of tiles on a flat surface with the intended spacers. Measure the complete repeated unit from one setting-out line to the next. This dry layout reveals the true module more reliably than calculations based only on product names.
What actual size changes in a room layout
A difference of a small amount on one tile can become more noticeable across many repeated rows. Actual size influences the distance between setting-out lines, the position of joints and the width of cuts where the installation meets walls, corners or fixed fittings.
If a layout is planned using nominal dimensions but the bodies are smaller, the completed run may include more grout than expected. If the bodies are larger, the run may extend farther and leave narrower perimeter cuts. Mixing dimensions can also cause joints to drift out of alignment.
The effect is more obvious in long corridors, large floors, stacked wall patterns and designs where joints must line up with architectural features. Multi-format patterns add another layer because several tile sizes and several joints must work together as one repeated unit.
A practical setting-out process should include:
- Measure several tiles from the boxes rather than relying on one piece.
- Dry-lay a row using the intended joint spacing.
- Measure the complete row or repeating module.
- Mark reference lines based on that real measurement.
- Check the likely cuts at both ends before fixing begins.
Measuring several pieces also shows whether the tile has enough dimensional variation to affect the selected joint.
Choosing a realistic grout-joint width
A very narrow grout joint is not automatically more refined. It is less able to disguise variation in tile size or edge shape, and small alignment adjustments become more visible. A slightly wider, consistent joint can look more orderly than an exceptionally narrow joint that wanders.
The appropriate width depends on the product’s dimensional consistency, edge type, flatness, pattern and installation conditions. Substrate quality and the size of the tiled area also matter. Offset patterns can make differences in tile shape or flatness more apparent, particularly with elongated formats.
Rectified tiles may support narrower joints than comparable non-rectified tiles, but they still require a planned joint. Grout lines accommodate dimensional tolerances, allow the layout to be adjusted and provide a defined space for the specified grout system. The product guidance and applicable installation requirements should take priority over a purely aesthetic preference.
When evaluating joint width, dry-lay tiles from more than one box. Use spacers and inspect the arrangement from normal viewing distance. The aim is not merely to make the gap as small as possible, but to create straight, repeatable courses that work with the tiles actually supplied.
Matching boxes for one installation
Before installation, compare every box rather than assuming identical front labels mean identical contents. Packaging can contain the information needed to identify calibre, batch and shade groups, although the position and wording vary by manufacturer.
A useful checking sequence is:
- Confirm that the product name, finish and nominal format match.
- Look for stated actual dimensions and thickness.
- Compare calibre, lot, batch and shade markings.
- Open boxes carefully and inspect several tiles in good light.
- Dry-lay pieces from different boxes together.
- Check edge alignment, joint consistency and overall appearance.
Do not begin by installing one complete box at a time without assessing the others. Where the boxes are confirmed as compatible, drawing from several during installation can help distribute minor appearance variation naturally. If markings or dimensions differ, keep the groups separate until their suitability has been established.
Plan the required quantity carefully and allow for cuts, breakage, pattern demands and future repairs. Obtaining enough consistently grouped material at the start is generally easier than trying to match an additional order after work has begun.
Buying replacements or extending an existing tiled area
Nominal size is only the starting point when replacing a damaged tile or extending an older installation. A newly purchased tile with the same advertised dimensions may have a different actual size, calibre, thickness, edge profile or surface appearance.
Measure the existing tile body separately from the grout joint. Measuring from the centre of one joint to the centre of the next gives the installed module, not necessarily the tile’s actual dimensions. If possible, measure an exposed spare tile or a piece that can be removed without damage.
Retained packaging is particularly useful because it may preserve the original product reference and production codes. Spare tiles from the initial installation provide the strongest practical match and can also show how an unused surface compares with the installed floor or wall.
Even when the dimensions align, a later production batch may differ subtly in colour, pattern distribution, sheen or texture. Existing tiles may also have changed through wear, cleaning and exposure. Check replacements in the actual room lighting before treating them as a seamless match.
The checks that prevent size surprises
Treat the size printed on a tile box as a description of the format, not a guarantee that every edge measures exactly that number. Verify actual dimensions where available, compare calibre and batch markings, and account for the grout joint when calculating a repeated module.
Before installation, measure representative pieces and test the intended pattern with spacers. Base setting-out lines and perimeter cuts on the dry-laid result rather than nominal arithmetic alone. Finally, obtain enough consistently grouped material for the project and retain labelled spare tiles for future repairs.
These checks take little time compared with correcting drifting joints or trying to match a discontinued batch later. More importantly, they turn the number on the box into what it should be: a useful format label supported by real measurements and a layout planned around the tiles in hand.