


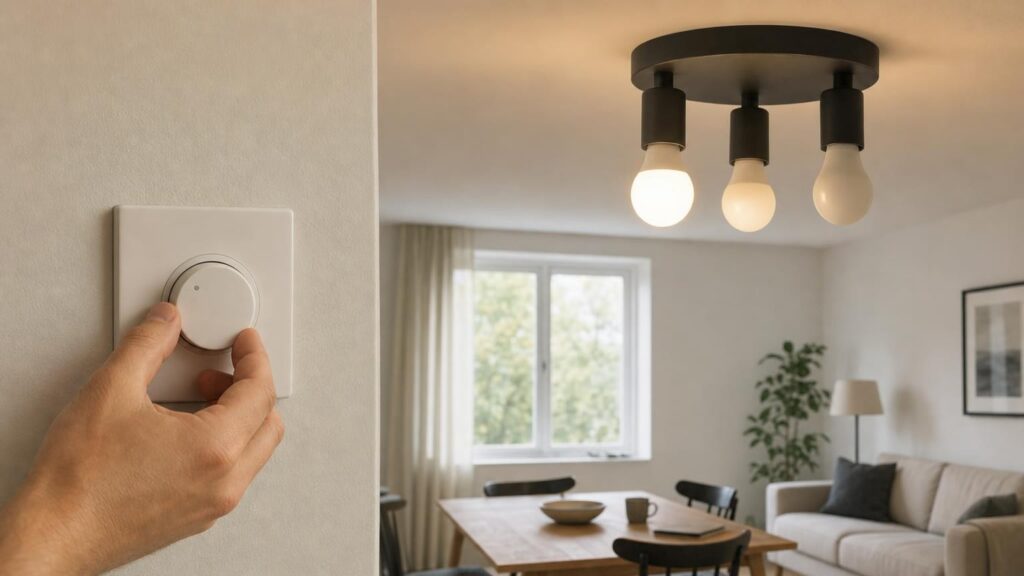
Buying a bulb marked “dimmable” may seem like the only requirement for adjustable lighting. In practice, the bulb, its internal electronic driver and the wall dimmer have to work together as one electrical system. If they do not, the result can be flicker, buzzing, delayed start-up, uneven brightness or a surprisingly narrow dimming range.
This does not necessarily mean that either product is defective. A bulb can operate perfectly on one dimmer but behave poorly on another because the two devices process power differently. Understanding that interaction makes it easier to choose compatible products and diagnose problems without replacing components at random.
Why “dimmable” does not always mean smooth dimming
An incandescent filament responds directly to the power supplied to it. Reduce that power and the filament becomes cooler and dimmer, usually in a visually smooth way. An LED is different: it requires electronic circuitry, known as a driver, to convert the incoming mains supply into power the LEDs can use.
A dimmable LED driver is designed to recognise and respond to a reduced or modified supply. However, there is no guarantee that every driver will interpret the output of every wall dimmer in exactly the same way. “Dimmable” therefore means that the bulb is designed for dimming, not that it will provide silent, stable performance with all controls or at every possible setting.
The lowest setting is often the most demanding. A combination may work well at medium and high brightness but become unstable when very little power is being supplied. The practical dimming range can consequently be smaller than the full movement shown on the wall control.
How wall dimmers and LED drivers interact
Many wall dimmers use a method called phase-cut dimming. Instead of simply reducing voltage in a continuous fashion, the dimmer removes part of each alternating-current waveform. The bulb’s driver receives what remains and uses it to determine the intended light level.
Traditional dimmers were commonly designed around relatively high-wattage incandescent or halogen lamps. Those loads behave differently from low-wattage electronic LED drivers. When an older control is connected to LEDs, it may not receive enough electrical load to operate consistently. Its switching behaviour may also be difficult for the bulb driver to interpret.
Possible results include:
- visible pulsing or rapid flicker;
- occasional flashes, particularly at low settings;
- a delay before the bulbs illuminate;
- lights that suddenly jump between brightness levels;
- bulbs that switch off before the control reaches its minimum position; and
- buzzing from the bulbs, dimmer or both.
These symptoms can overlap, so one symptom rarely proves a single cause. Flicker, for example, could arise from an unsuitable dimmer, an unstable low-end setting, mixed bulb drivers or another installation issue.
Leading-edge versus trailing-edge dimmers
The two common forms of phase-cut control are leading-edge and trailing-edge dimming. Their names describe which part of each AC waveform is removed.
Leading-edge controls
A leading-edge dimmer cuts off the beginning of each waveform before switching the power on for the remainder. This approach has long been used with conventional incandescent and halogen loads. Many older installed dimmers use it, often with minimum loads based on the higher wattages of those lamp types.
Some dimmable LEDs are designed to work with leading-edge controls, but compatibility should not be assumed. The abrupt switching and load requirements can contribute to noise or low-level instability with certain LED drivers.
Trailing-edge controls
A trailing-edge dimmer switches on at the start of the waveform and removes its later portion. These controls are often designed to handle lower-wattage electronic loads and may offer smoother operation with compatible LEDs. That does not make every trailing-edge dimmer universally suitable, however. Its stated lamp support, load range and adjustment options still matter.
When choosing a dimmer, look beyond broad wording such as “LED compatible”. Check whether it supports the particular lamp technology, whether it is leading-edge, trailing-edge or configurable, and what load range is specified for LEDs. A dimmer may have different limits for LED lamps than for incandescent lamps.
Minimum load, maximum load and multi-bulb circuits
Every dimmer has an operating load range. The minimum is especially relevant when older lamps are replaced with LEDs. Several incandescent bulbs may once have created a substantial load, while equivalent-output LEDs use much less power. The replacement circuit can therefore fall below the dimmer’s minimum even though the number of bulbs has not changed.
Below its intended load, a dimmer may fail to switch reliably or may not maintain stable output. Adding bulbs can sometimes change the behaviour because it raises the total load, but adding lamps is not a sound substitute for selecting an appropriate control.
The maximum load matters too. Start by adding the rated wattages of all bulbs on the dimmed circuit, then compare the result with the dimmer’s stated LED range. Do not assume that its incandescent maximum also applies to LEDs. LED drivers can draw power differently during start-up and switching, so dimmer manufacturers may specify a separate, lower LED limit.
Total wattage is useful, but it does not tell the whole story. A group of nominally identical bulbs may behave consistently because their drivers respond similarly. A mixture of brands, models, wattages or lamp technologies can react unevenly to the same waveform. One bulb might remain lit while another drops out, or different bulbs may appear to dim at different rates.
For predictable multi-bulb performance, use matching bulb models where practical and confirm that both their combined load and quantity are suitable for the dimmer.
Dimming range, dropout and low-end adjustment
Maximum brightness, minimum stable brightness and usable dimming range are separate considerations. A bulb that reaches full brightness correctly may still perform poorly near the bottom of the control.
“Dropout” occurs when a bulb switches off as the level is reduced, even though the dimmer has not reached its off position. A related problem is failure to start: the bulb may stay dark when switched on at a very low setting but illuminate if the level is raised first. Other bulbs may flash, pulse or step noticeably between levels rather than fading smoothly.
This happens because the driver needs enough usable power to start and remain operating. The minimum stable point varies with the bulb and dimmer combination. It may also differ slightly among bulbs on the same circuit.
Some LED-compatible dimmers provide a low-end trim or minimum-brightness adjustment. This allows the lowest selectable level to be set just above the point where flicker or dropout begins. It does not make the bulb physically dimmer; instead, it removes the unstable part of the control range. A correctly adjusted range is usually more useful than a control that travels lower but produces flashing or unreliable start-up.
What flicker, buzzing and inconsistent brightness can indicate
Visible pulsing or occasional flashes
Flicker at a particular setting often suggests that the driver is not receiving or interpreting stable power at that point. If it appears only near minimum brightness, the low-end setting or minimum load is a reasonable place to investigate. Flicker throughout the range may indicate broader incompatibility or an issue beyond simple adjustment.
Buzzing or humming
Electrical switching can cause components inside a driver or dimmer to vibrate physically, creating audible noise. A faint sound close to a device and a clearly intrusive buzz are not the same shopper experience, but neither can be assessed from a “dimmable” label alone. Noise that changes with the brightness setting often points to the interaction between the control and driver.
Uneven output between bulbs
Bulbs on one circuit receive the same dimmer output, but their drivers may respond differently. Mixed models make this more likely. Even matching bulbs can reveal small differences at the edge of their stable operating range, particularly just before dropout.
Erratic or delayed start-up
If lights only start after the dimmer is raised, the selected level may be below the drivers’ start-up threshold. If behaviour is unpredictable at all settings, check the documented load and compatibility rather than treating it solely as a low-end problem.
Symptoms are useful clues, not definitive electrical diagnoses. Persistent flashing, damaged controls, unusual heat, tripping or wiring concerns warrant assessment by a qualified electrician.
Compatibility details worth checking before buying
A focused compatibility check is more useful than relying on general claims. Before buying bulbs or a replacement dimmer, consider the following:
- Confirm that the bulb is explicitly dimmable. A non-dimmable LED should not be treated as dimmable simply because it appears to change brightness on a particular control.
- Identify the installed dimmer. Look for its type, supported lamp technologies and LED-specific load range. If these details cannot be established, compatibility remains uncertain.
- Check manufacturer guidance. Bulb and dimmer manufacturers may publish tested compatibility information or recommended controls. This is useful evidence, although it cannot guarantee identical performance in every installation.
- Calculate the circuit load. Include every bulb controlled by that dimmer and use its LED rating rather than an unrelated incandescent figure.
- Avoid mixing lamp designs. Matching bulbs reduce the chance of visibly different dimming curves, start-up points and dropout levels.
- Consider the desired minimum brightness. If very low light levels matter, look for documented dimming-range information and a compatible control with low-end adjustment where available.
Also distinguish between a bulb’s colour characteristics and its electrical compatibility. Two bulbs with the same cap, wattage and colour temperature may contain very different drivers and therefore behave differently on the same dimmer.
Why smart bulbs usually need constant power
Most smart bulbs contain a radio, processor and electronic controls as well as an LED driver. These components generally need a continuous, suitable power supply so the bulb can receive commands from an app, remote, hub or voice-control system.
A conventional wall dimmer alters the power reaching the bulb. This can cause a smart bulb to disconnect, reset, flicker or operate unpredictably. Unless the bulb manufacturer explicitly supports that arrangement, a smart bulb is normally used with constant power and its brightness is adjusted internally through its smart controls.
This is different from a smart wall dimmer. A smart dimmer replaces or supplements the wall control and adjusts ordinary compatible dimmable bulbs while adding connected control. The bulbs themselves do not need to be smart. As with a conventional dimmer, the smart wall control must still suit the lamp type, circuit and load.
Shoppers should therefore decide where they want the intelligence to sit. Smart bulbs offer individual bulb control but usually need the wall supply left on. A smart dimmer can provide familiar wall operation for a whole lighting circuit, but requires compatible dimmable lamps and an appropriate installation.
A practical path to a stable, quiet setup
Begin by verifying that every installed bulb is dimmable and, for a multi-bulb fitting, preferably the same model. Note whether problems occur throughout the range or only near minimum brightness. Then calculate the total LED wattage and compare it with the dimmer’s LED-specific minimum and maximum limits.
Identify the control type and check documented compatibility from both sides where information is available. If the dimmer has a low-end trim, set the minimum above the point where flicker, dropout or failed start-up occurs. For smart bulbs, remove conventional dimming from the power path unless the manufacturer expressly permits it.
When troubleshooting, change one component or setting at a time. This makes it easier to distinguish a faulty bulb from a poor bulb-and-dimmer pairing. If the products appear compatible but the circuit remains unstable, or if there are signs of damaged equipment or wiring problems, ask a qualified electrician to assess the installation.
The key buying lesson is simple: smooth LED dimming depends on compatibility across the whole system. The bulb label is only the starting point. Dimmer technology, load range, number and type of bulbs, low-end adjustment and the need for constant power all help determine whether the finished lighting is stable, quiet and genuinely useful.
Continue exploring on Frowse
Discover More Frowse Insights
- Why Badminton Rackets of the Same Weight Can Feel Completely Different
- Why Vacuum Storage Bags Slowly Reinflate – and What to Check Before Buying
- What a Sleeping Mat’s R-Value Reveals – and What It Leaves Out
- Conventional, Beam and Hybrid Wiper Blades: What Changes Against the Glass
- Beyond GSM: What Really Makes a Towel Absorbent, Soft and Slow to Dry