





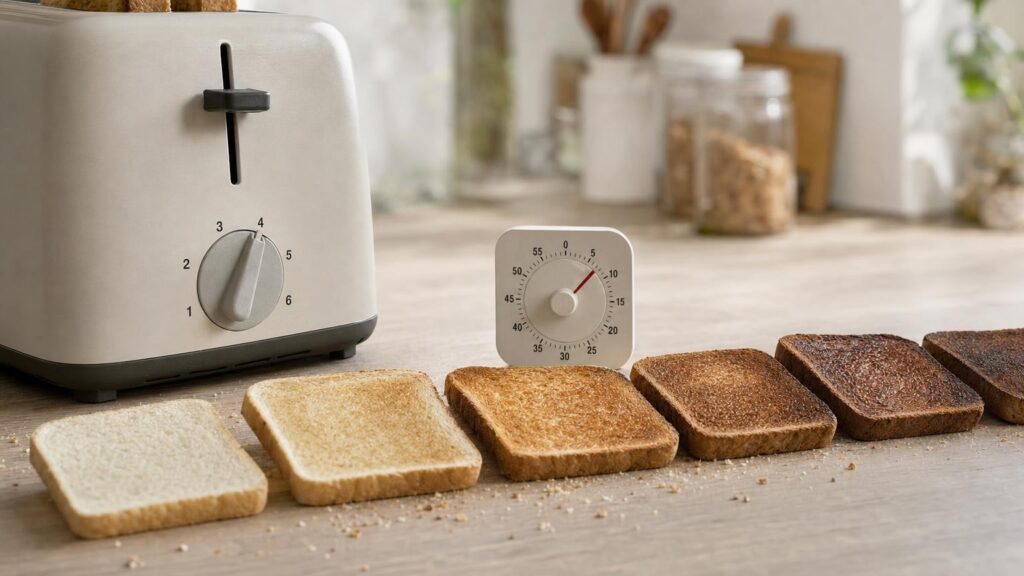
A toaster dial marked from 1 to 6 can look like a simple timer, but on most pop-up toasters those numbers are better understood as relative browning settings. Selecting 3 does not necessarily mean that the bread will toast for three minutes, nor will setting 3 on one model produce the same colour as setting 3 on another.
The dial usually controls part of the toasting cycle, often its duration, but the markings form a model-specific scale rather than a universal measure of elapsed time. The final result also depends on the heating elements, slot design, bread and starting temperature. Understanding these variables makes it easier to compare toasters and find a setting that delivers repeatable results.
Why toaster dial numbers are easy to misread
Numbered controls invite comparison with familiar measurements. A microwave may display seconds, while an oven has a temperature scale. A toaster dial rarely provides that kind of standardised information. Its numbers generally describe progression from lighter to darker toast within that particular appliance.
Higher settings commonly produce a longer heating cycle, but that does not turn the printed number into a minute value. The intervals between markings may not correspond neatly to equal units of time, and manufacturers can use different control systems and scales. A setting of 4 might be moderate on one toaster and quite dark on another.
This is why the dial is most useful as a reference for repeating a result on the same appliance. Once you know that a particular loaf comes out as you like it at a certain setting, the number helps you return to that result under similar conditions.
What the browning control actually changes
Pop-up toasters can use mechanical, electromechanical or electronic controls to determine when a cycle ends. In a broadly timer-based design, turning the dial changes how long the elements remain energised before the carriage releases. Other designs may use electronic circuitry to manage the cycle, sometimes with some allowance for the appliance’s starting condition.
Even when cycle duration is the main variable, the toaster is not necessarily measuring and displaying ordinary minutes. The dial is selecting a calibrated operating range. Its labels might be numbers, dots or words such as light, medium and dark, but their purpose is substantially the same.
Some designs may attempt to improve consistency by responding to temperature or by adjusting cycle behaviour after the toaster has warmed up. That does not guarantee identical toast every time because the appliance cannot fully compensate for every change in bread thickness, moisture, placement and composition.
Control granularity matters more than the largest printed number. A dial with clearly separated, usable increments can make fine adjustment easier. A broad scale is less helpful if a small movement causes a large change in colour or if the control is too loose to return to the same position reliably.
How heating elements and slot design affect the result
Toast browns through radiant heat from the elements positioned beside the bread. Their arrangement and the way heat is distributed influence how quickly and evenly the surface colours. Gaps in effective element coverage can leave pale bands, while differences in distance between the bread and each side may produce uneven faces.
Slot geometry is therefore more than a question of whether a slice physically fits. Width, length and depth affect how the bread sits relative to the elements. A short slot may leave the top of a tall slice less exposed, while a shallow carriage can allow part of the bread to extend beyond the main heated area.
Wide slots can accommodate thick slices, split rolls and some irregularly shaped breads. The trade-off is that thin slices need to be held near the centre rather than leaning towards one element. Bread-centering guides can help keep different thicknesses at a more even distance from both sides, although their effectiveness depends on the shape and flexibility of the bread.
A larger slot does not automatically mean better toasting. Shoppers should consider the bread they use most often. A toaster designed around standard sliced bread may suit everyday sandwich loaves, while genuinely suitable slot dimensions and centering become more important for thick hand-cut slices or taller bakery loaves.
Bread type, thickness and moisture matter as much as the setting
A toaster setting cannot produce one fixed shade across every kind of bread. Thick, dense or moist slices generally need more energy before their surfaces reach the same degree of browning as thin, dry slices. Fresh bread may behave differently from bread that has been stored for several days because its moisture content has changed.
The ingredients matter too. Breads containing more sugar can brown readily, while enriched products may colour differently from a basic loaf. Dense wholegrain bread, airy white bread and a sweet fruit loaf should not be expected to react identically at one dial position. Loose fruit or sugary coatings can also make some products unsuitable for an ordinary toaster, so the appliance and food instructions should be followed.
Thickness affects both browning and fit. A thin slice has less mass and may dry and colour quickly. A thick slice takes longer to warm through, but its surface may sit closer to the elements in a narrow slot. This combination can create a toasted exterior before the centre becomes as warm as expected.
For repeatability, compare like with like. If yesterday’s slice was thin and slightly dry while today’s is thick and freshly cut, the changed result does not necessarily indicate a faulty browning control.
Cold starts, frozen bread and dedicated modes
Starting temperature changes how much energy is needed. Frozen bread must first absorb heat as it warms and loses its frozen state before its surface can toast in the usual way. Using the normal setting without compensation may leave it less browned or less evenly warmed than a room-temperature slice.
A dedicated frozen mode generally modifies or extends the cycle to account for the colder starting point. The exact operation is model-specific, so it should not be interpreted as a standard amount of extra time across all toasters. Its value lies in offering a repeatable process without requiring the user to guess a much higher browning setting.
Other buttons perform different jobs:
- Reheat is intended to warm previously toasted bread with limited additional browning, although some colour change may still occur.
- Defrost or frozen compensates for bread starting below normal storage temperature before or during toasting.
- Cancel stops the current cycle and raises the carriage.
- Extra lift raises smaller items higher after the cycle so that they are easier to remove. It does not increase browning.
Clear controls are useful when comparing appliances. Distinct indicators and buttons reduce the chance of confusing a special mode with an ordinary browning level.
Why the second batch can come out darker
The first cycle often begins with the toaster at room temperature. By the time a second batch is loaded, the elements, internal surfaces and surrounding structure may retain heat. The next slices therefore start in a warmer environment, even if the dial has not moved.
Depending on the design, that thermal build-up can make a later batch toast faster or finish darker. Some control systems compensate for residual heat more effectively than others, but repeated batches remain a demanding test of consistency.
This behaviour is another reason the dial should not be treated as a fixed clock. Even if two cycles lasted for a similar period, their thermal starting conditions would differ. For households that regularly make several rounds at breakfast, consistency across consecutive cycles may matter more than the exact appearance of the control scale.
How to find a repeatable setting in everyday use
A short calibration process is more reliable than assuming a dial number has a universal meaning:
- Begin conservatively. Start near the lower-middle part of the scale for unfamiliar bread. It is easier to add a little more browning than to reverse burnt toast.
- Use comparable slices. Test bread from the same loaf at a similar thickness and storage temperature.
- Change one variable at a time. Move the control by one marked step or a small, repeatable amount rather than changing the setting dramatically.
- Record useful positions. Remember separate reference settings for common foods, such as a standard sliced loaf and thicker bakery bread.
- Use the appropriate mode. Select frozen mode for frozen slices if the toaster provides it instead of assuming the ordinary dial will compensate automatically.
- Allow for a warm appliance. Later batches may need a slightly lower setting if the toaster does not compensate well for retained heat.
Interrupting and restarting a cycle can make the result harder to predict. Pressing cancel and then beginning a new full cycle may apply substantially more heat than simply letting the original cycle finish. If toast needs only a little more colour, monitor the additional cycle closely and cancel it early rather than relying on the previous dial position.
Crumb build-up can also interfere with normal use and should be removed according to the manufacturer’s cleaning instructions. Always unplug the appliance and let it cool before cleaning, and do not insert utensils into the slots.
What these differences mean when comparing toasters
The largest number on a dial does not indicate greater power, better performance or a wider useful range. More relevant comparison points are how well the control supports the bread and routines of the household.
Look for sufficiently fine browning adjustment and controls that are easy to set consistently. If several people prefer different shades, clear markings can make it easier to return to each person’s usual position. Dedicated modes should be visibly differentiated so that their status is obvious during use.
Match slot geometry to real needs rather than choosing the widest slot by default. Consider the height, thickness and shape of bread used regularly, along with centering guides for thin slices. Element coverage and bread position influence whether browning reaches the edges and whether both faces receive similar heat.
If the toaster will often make consecutive batches, control consistency from a cold start to a warm appliance deserves attention. Independent testing and carefully described user observations can be more informative here than the dial’s numbering alone. When assessing such information, look for comparisons made with similar bread and repeated conditions rather than isolated photographs.
The useful way to read a toaster dial
A toaster dial is best treated as a repeatable reference for one appliance, not as a clock. Its setting works together with cycle control, element layout, slot geometry, bread thickness, moisture, starting temperature and residual heat.
Once those factors are understood, the numbers become more useful rather than less. They provide a practical way to reproduce a preferred result with familiar bread and to make controlled adjustments when conditions change. When shopping, prioritise usable adjustment, suitable slots, effective centering, clear special modes and consistency across batches instead of assuming that a bigger number promises longer or better toasting.