


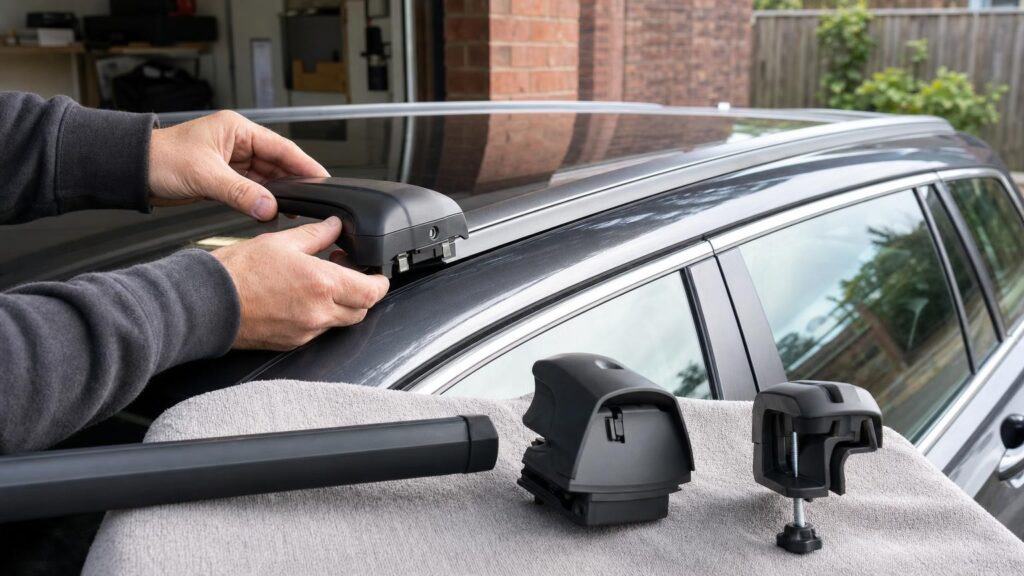
Choosing a car roof rack is not simply a matter of finding two bars of roughly the right width. The rack has to match the vehicle’s roof construction, approved attachment method and dimensions. It must also work with the intended bike carrier, roof box, kayak holder or other accessory.
This makes compatibility a system-level question. A suitable setup may involve bars, feet, a vehicle-specific fitting kit, locks or covers, accessory adapters and the carrier itself. Before buying any part, identify how the vehicle is designed to accept a rack and check the complete combination against authoritative fitting information.
Why roof-rack compatibility starts with the car
Many rack components look broadly similar, but small differences in roof shape, door frames, rail profiles and fixing-point positions can change what fits. Even two cars with the same model name may use different systems because of body style, model year, roof option or the presence of factory rails.
Start with the vehicle’s exact make, model, year and body style. If relevant, note whether it is a three-door, five-door, estate, saloon or long-wheelbase version. Then identify the roof type. Manufacturer handbooks and rack-brand fit guides are more reliable than judging compatibility from photographs alone.
The intended use matters as well. A rack that fits the roof is only part of the solution: its bar profile, spacing and load capacity must also suit the roof-mounted carrier. Compatibility with the car does not automatically mean compatibility with every accessory.
Identify the roof type before comparing rack systems
Most passenger vehicles fall into one of four broad roof categories.
- Bare roof: There are no external rails or obvious mounting points. The correct system may use feet that sit on the roof and vehicle-specific clamps that engage around the upper door frame.
- Raised rails: These run from front to back with a visible and usable gap between the rail and roof. Rack feet normally wrap around or grip the rails.
- Flush or integrated rails: These also run lengthways but sit directly against, or very close to, the roof. They require feet shaped for the rail profile or connection points built into it.
- Factory fixing points: Threaded holes or dedicated mounting interfaces are built into the roof. They may be visible or hidden beneath small covers, sliding panels or sections of trim.
Misidentification is common. A decorative trim strip is not necessarily a rail, and a rail without space underneath is not a raised rail. Conversely, a roof that appears bare may conceal factory fixing points. Do not prise up trim simply because it resembles a cover; consult the vehicle handbook or approved fitting instructions first.
Factory-fitted and aftermarket rails can also differ. When using a compatibility tool or seeking fit information, check whether it assumes the vehicle has its original roof equipment.
How each attachment system works
Door-frame clamp systems
On many bare roofs, a padded foot rests on a specified area while a shaped metal clamp hooks around the door-frame edge. Tightening the mechanism pulls the foot and clamp together. The fitting kit is usually specific to the vehicle because roof curvature, door-frame shape and clamping position vary.
The clamp must sit exactly where the instructions specify. A clamp that appears to engage securely elsewhere may interfere with a seal, apply pressure in the wrong place or prevent the door from closing correctly.
Rail-gripping feet
Feet for raised rails typically close around the rail, while flush-rail feet may use shaped pads, side-gripping jaws, pins or designated holes. The broad description “for roof rails” is therefore not enough. The foot must support the particular rail type, shape and dimensions.
Factory fixing-point systems
These use bolts, studs or adapters that connect to mounting points provided by the vehicle manufacturer. They can offer clearly defined installation positions, but the thread, spacing, adapter and surrounding trim arrangement must still match the exact vehicle.
A complete rack commonly consists of bars, feet and a fitting kit. Locks or lockable covers may be included or sold separately. Parts from different ranges – or even different generations from one brand – should not be assumed interchangeable merely because they look alike. Check the specified part combination rather than selecting each item independently.
Raised rails and flush rails are not the same fit
The quickest visual distinction is the gap beneath the rail. If fingers can pass through a clear opening between rail and roof, it is generally a raised rail. If the rail meets the roof along most of its length, it is generally flush or integrated.
Raised-rail feet need enough space to wrap around the rail and must accommodate its width and shape. Flush-rail systems instead depend on the rail’s side profile, approved grip area or built-in connection details. Two flush rails may look nearly identical while requiring different pads or fitting kits.
Rail position also affects bar spacing. Some systems allow the feet to move along much of a raised rail, while others use defined positions. Required spacing may depend on both rack instructions and the carrier being mounted. The mere presence of factory rails does not establish that a particular rack will fit.
Bar profile, width and overhang
Once the attachment system is confirmed, consider the crossbars. Traditional square or rectangular bars are often straightforward for accessories that use wrap-around clamps. Their simple profile can make it easy to understand where a clamp will sit, although exposed angular bars may produce more wind noise than a well-designed aerodynamic alternative.
Aerodynamic bars have a shaped profile intended to manage airflow. Many include a top channel for compatible accessories. They may cost more, and their curved or wide shape can complicate some older wrap-around fittings. A top channel may also require a rubber strip to be cut, moved or opened according to the instructions.
Bar length must suit the vehicle and foot system. Bars that are too short may not reach the feet correctly. Bars that are unnecessarily long create extra overhang and may extend beyond what the manufacturer permits. Some systems use through-bars that project beyond the feet, while others use flush bars ending close to the foot. These layouts provide different amounts of usable space.
Quoted bar width is not always the same as usable mounting width. Feet occupy part of the bar, and curved end sections, end caps or transitions may not accept an accessory clamp. Before planning several carriers side by side, determine the straight, accessible section between or outside the feet.
Check how the roof-mounted accessory attaches
Roof boxes, bike racks and other carriers generally attach either around the bar or through a top channel.
- Wrap-around clamps: These pass beneath or around the bar. Check the permitted bar width and thickness, the shape the clamp can accommodate and the clearance underneath.
- Top-channel or T-track fittings: These slide into a channel and are secured from above. Check the required channel format and whether the carrier needs a separate adapter.
A carrier described as suitable for aerodynamic bars may still require a specific fitting kit. Likewise, a clamp that opens wide enough is not automatically compatible if it cannot sit flat, interferes with a foot or is unsuitable for the bar’s profile.
Measure the usable mounting area rather than relying only on total bar length. Wide feet can restrict clamp placement, while a narrow foot spacing can leave insufficient room for a carrier’s mounting points. Follow any minimum or maximum crossbar-spacing requirements stated by the carrier manufacturer.
The three load limits that must agree
A roof-rack setup is governed by several separate limits:
- The vehicle roof limit stated by the vehicle manufacturer.
- The rack-system limit for the bars, feet and fitting hardware in the approved configuration.
- The carrier limit for the roof box, bike carrier or other mounted accessory.
The lowest applicable limit governs the setup. A stronger pair of bars does not increase the vehicle roof limit, and a high vehicle limit does not override a lower rack or carrier rating.
Account for all weight that the vehicle roof must support. This normally includes the bars, feet, fitting hardware, carrier and cargo – not cargo alone. For example, the available allowance for items inside a roof box is reduced by the weight of the rack and box themselves.
Do not transfer a figure from another vehicle variant or assume every component in a product family has the same rating. Check the vehicle handbook and the instructions for the exact rack and carrier. Limits applying while driving should not be treated as proof of suitability for people or other unusual stationary loads.
Clearance and everyday-use checks
Physical fit is not the only practical consideration. Check whether an opening sunroof or panoramic roof can operate with the bars installed. Even if a glass panel clears the front bar, it may contact low-mounted clamps or a carrier. If the instructions require the roof to remain closed, follow that restriction.
Consider aerials and antennas, roof curvature and door seals. With clamp systems, inspect that the doors close normally and that seals sit as intended after installation. At the rear, open the tailgate carefully to check whether its upper edge or spoiler approaches a roof box, long carrier or cargo.
A loaded roof also increases total vehicle height. Know the new height before entering car parks, garages, ferries or areas with overhead barriers. Remove unused carriers when appropriate, as racks and accessories can add wind noise and may reduce fuel or energy efficiency.
Build a complete compatibility checklist
- Confirm the exact vehicle: Record model, year, body style and relevant factory roof options.
- Identify the roof: Distinguish between a bare roof, raised rails, flush rails and concealed or visible fixing points.
- Select the approved attachment parts: Match the feet and vehicle-specific fitting kit, rather than assuming visually similar parts will work.
- Choose suitable bars: Check profile, length, overhang, foot spacing and usable mounting width.
- Verify the carrier interface: Confirm wrap-around clamp dimensions or top-channel requirements, including any adapters.
- Calculate the load ceiling: Compare the vehicle, rack and carrier limits, then include the weight of every installed component and the cargo.
- Check clearances: Test doors, tailgate and permitted roof-panel operation, and record the vehicle’s loaded height.
- Keep the instructions: Retain tightening guidance, positioning information and any inspection requirements for future refitting.
The safest buying decision is based on the complete combination, not a single statement that a bar, foot or carrier is “universal”. When every interface is checked – vehicle to feet, feet to bars and bars to accessory – the result is easier to install, use and reassess whenever the cargo setup changes.
Continue exploring on Frowse
Discover More Frowse Insights
- Why Noise-Cancelling Headphones Work Better on Some Sounds Than Others
- Why Staples That Look the Same Do Not Fit Every Stapler
- Behind a Kitchen Knife’s Edge: Geometry, Hardness and Sharpenability
- Inside a Duvet: How Fill and Construction Determine Warmth
- Why Mechanical Pencil Leads of the Same Diameter Perform Differently